1. Create the bot
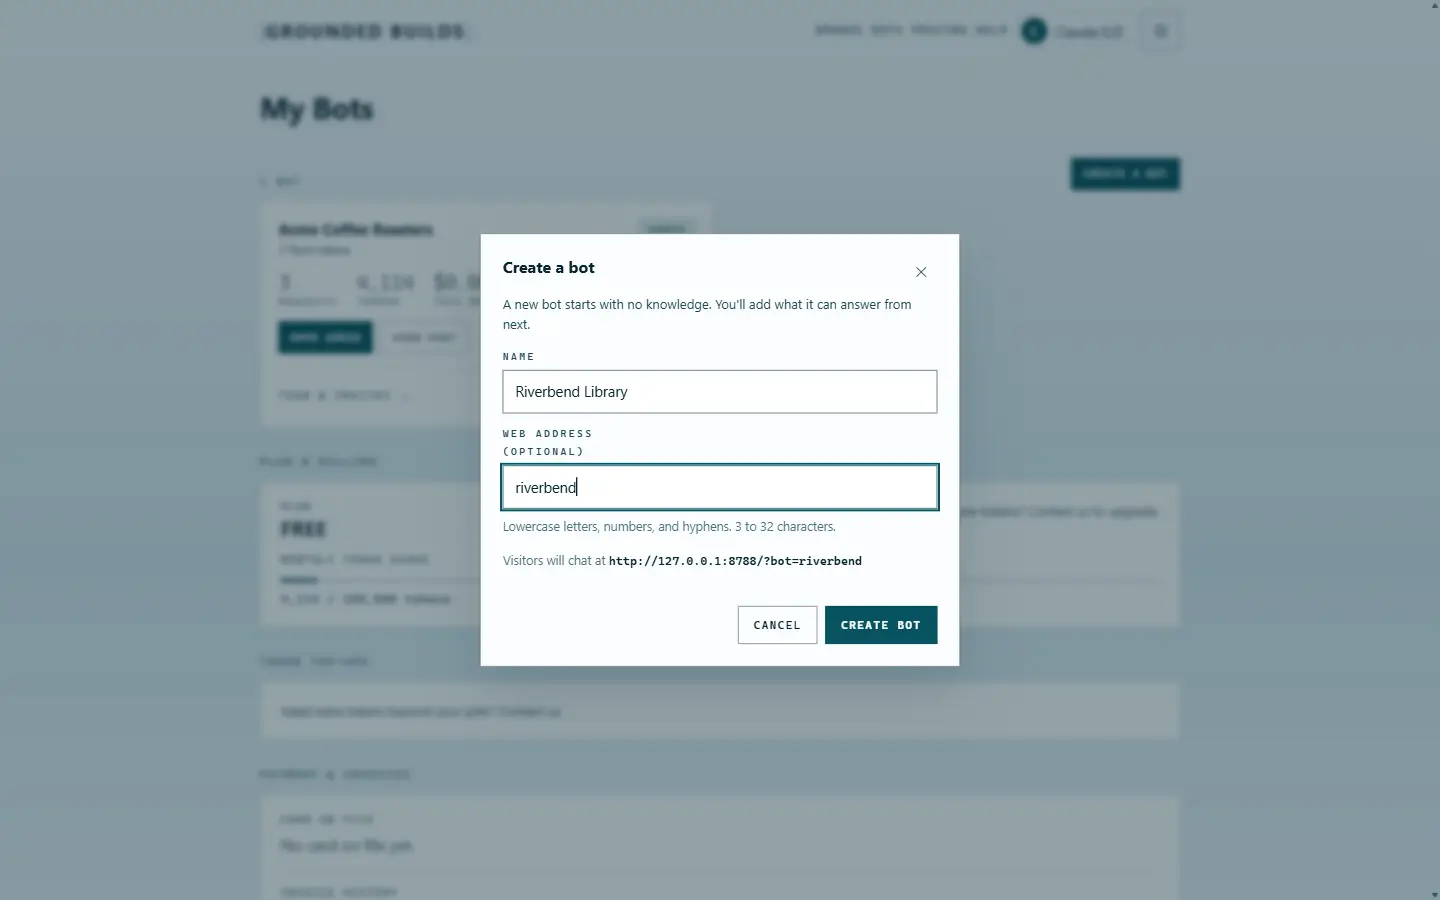
From My Bots, choose Create a bot. A bot needs a name; the web address is derived from it unless you set one. There is nothing else to decide yet, because a new bot has no knowledge, and a bot with no knowledge answers nothing.
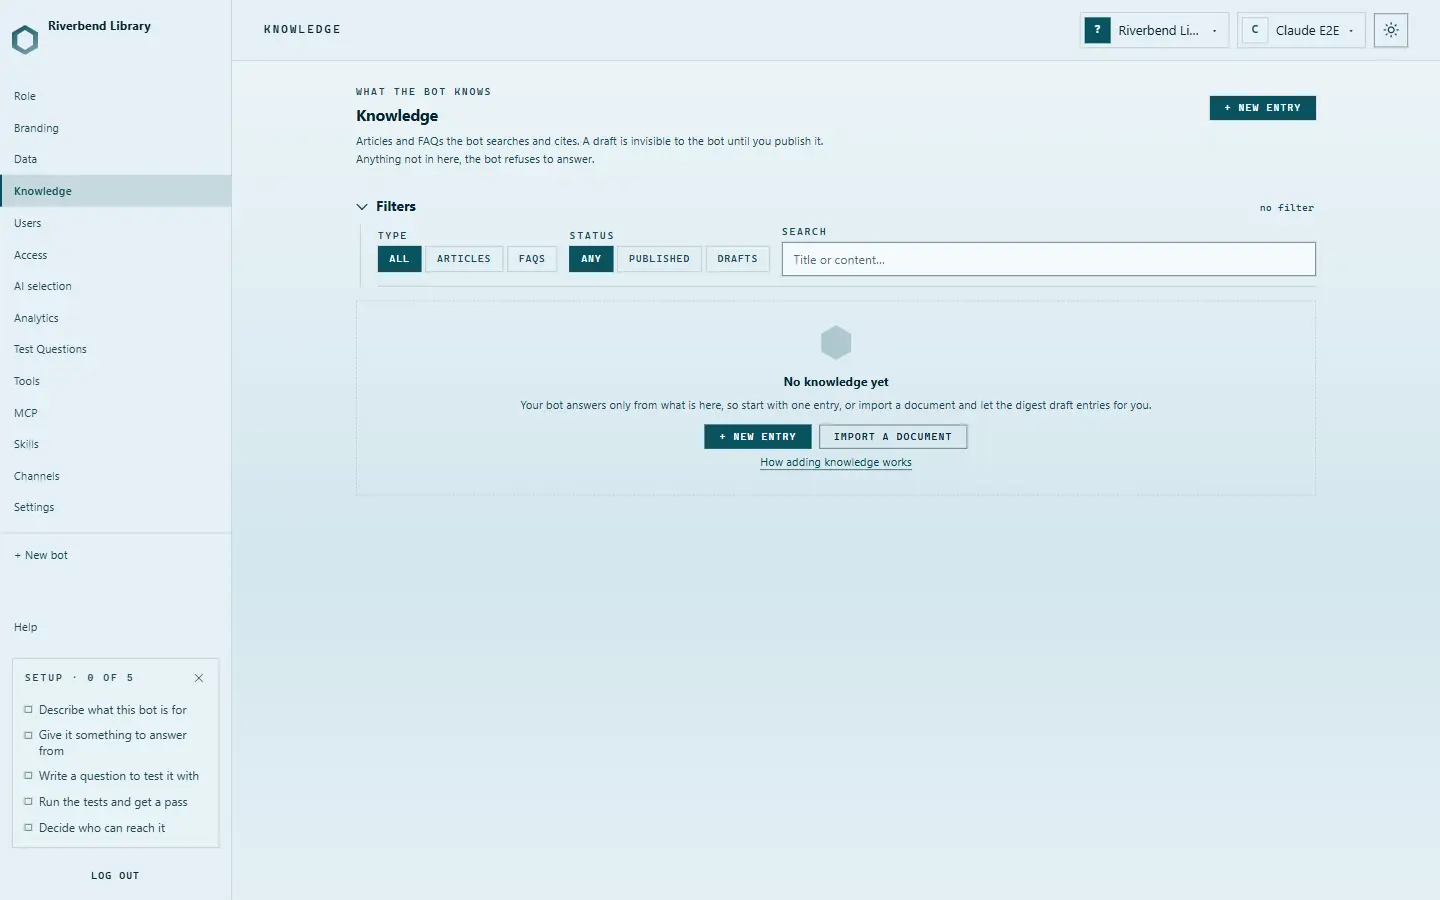
The console opens on an empty Knowledge page, with a five-item setup checklist in the sidebar. The rest of this guide is that checklist, in order.
2. Give it something to answer from
New entry. A title, and the text you want it to answer from — plain text or markdown, written the way you would want the answer to read. Everything the bot can ever say comes from entries like this one; a draft is invisible to it until published.
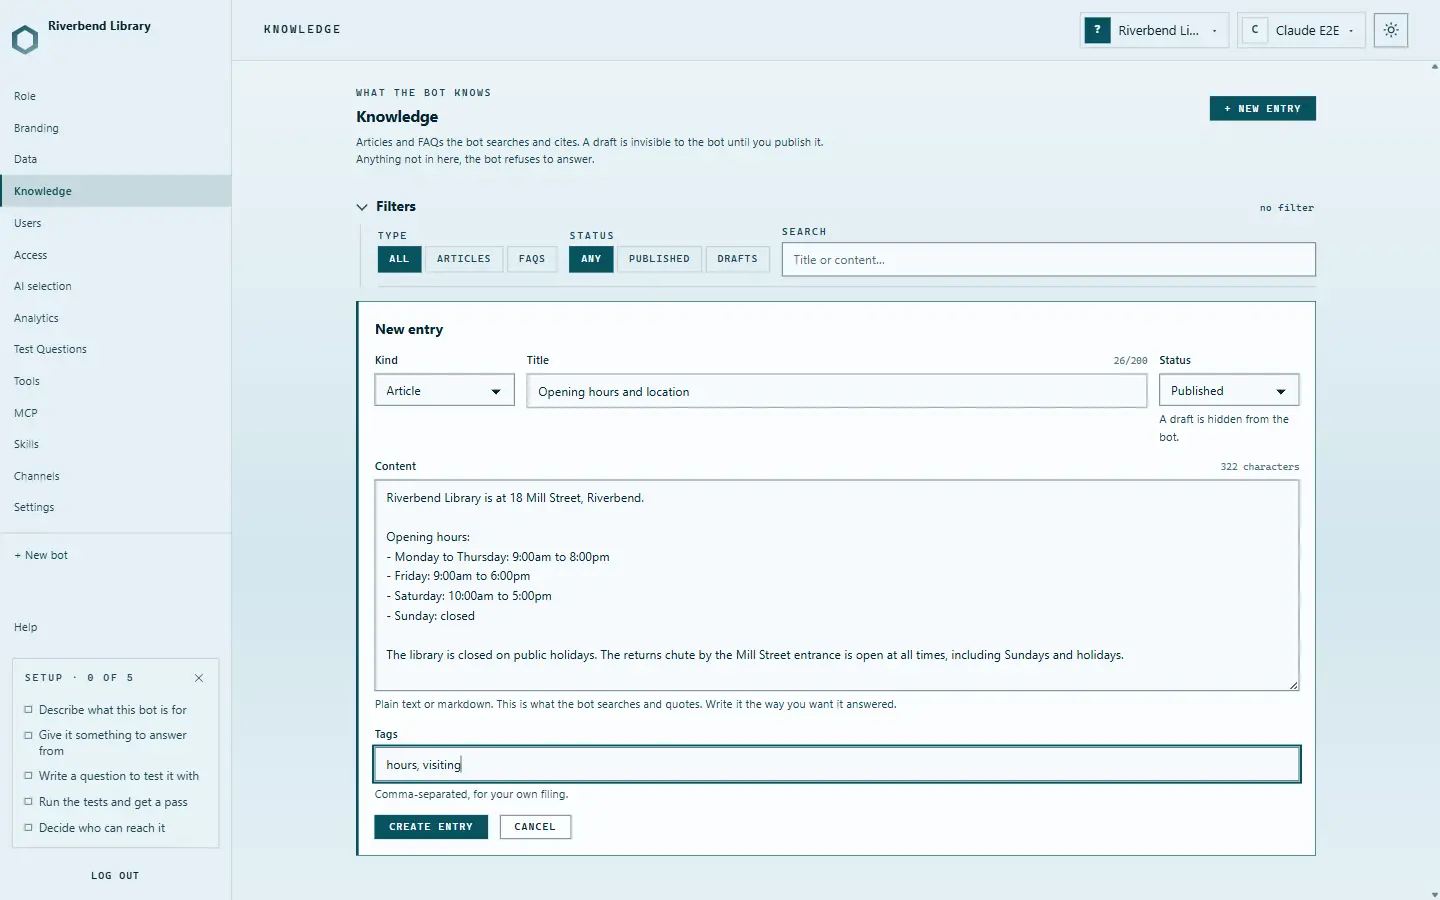
One entry is enough to prove the loop, which is the point of doing it in this order — a bot with one entry and a passing test is further along than a bot with fifty entries and no test. You can paste more, upload documents, or connect a dataset later; they all end up in the same place.
3. Set its scope, and the words it refuses with
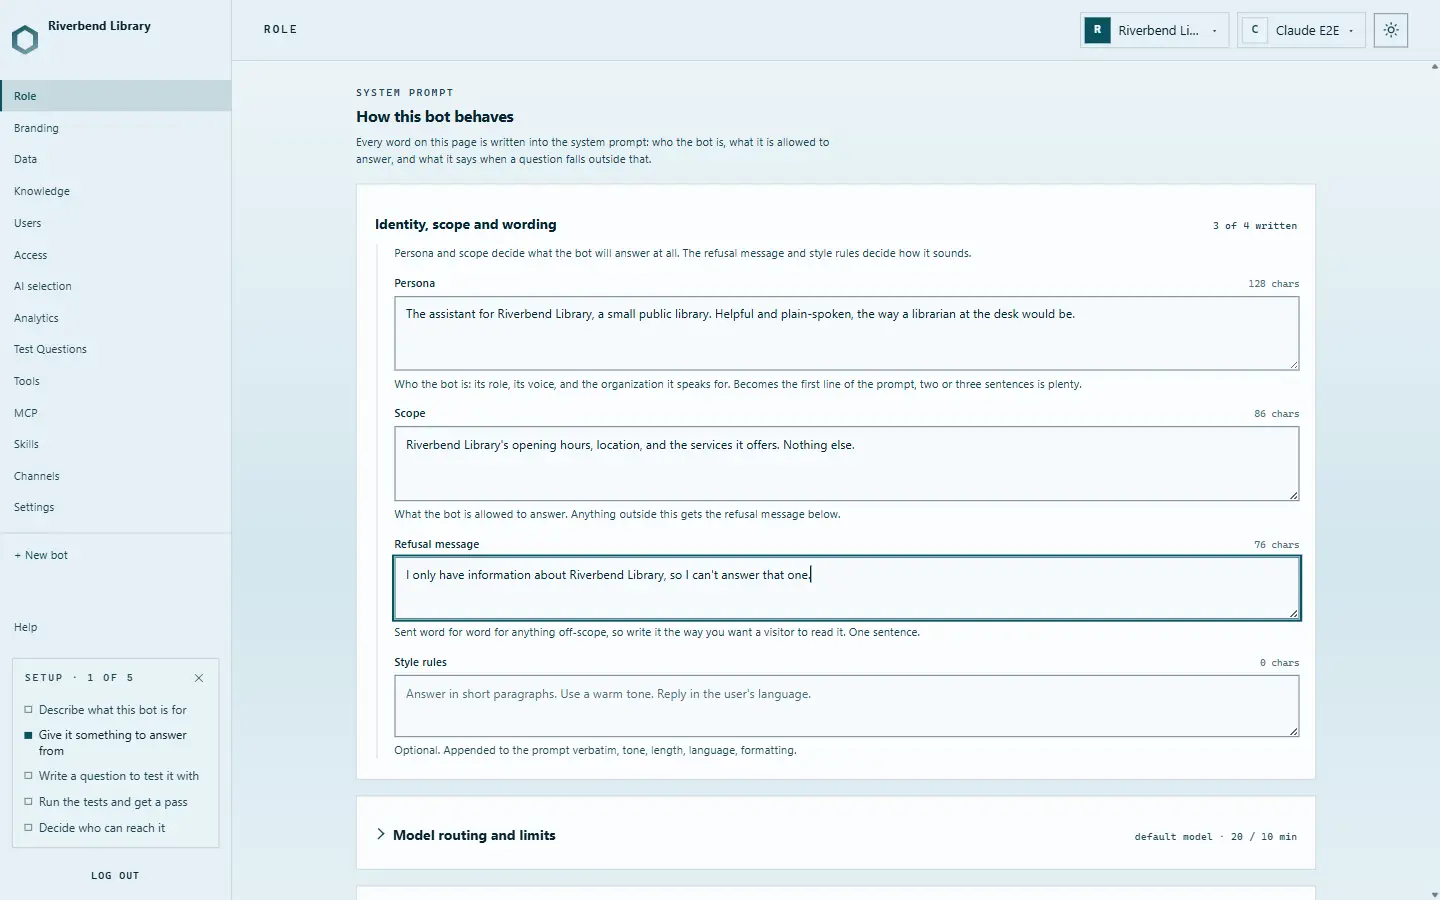
On Role: who the bot is, what it is allowed to answer, and — the field that does the most work — the sentence it says when a question falls outside that. The refusal is sent word for word, so write it the way you want a visitor to read it.
4. Write a test question, and run it
Test Questions is where a bot stops being a demo. Add the questions it must get right, with a substring the answer has to contain, and the questions it must refuse, ticking Expect a refusal. Two questions is a real test suite: one that proves it knows, one that proves it will not guess.
Running them asks the live bot every question, so it costs tokens against the month's usage — which is why it is a button and not something that happens on every save.
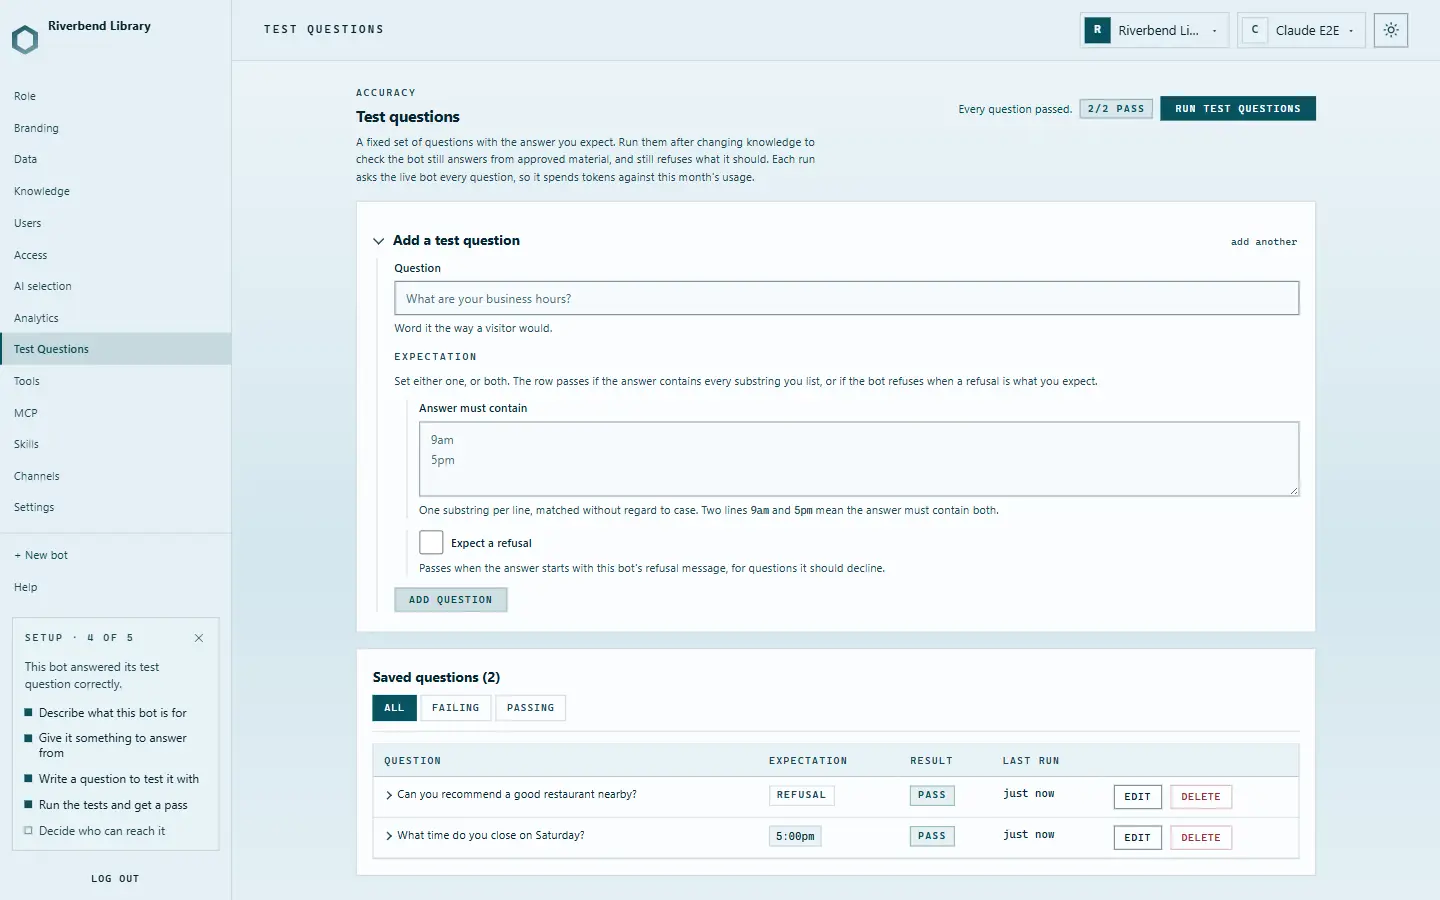
Re-run this after every change to the knowledge base. That is the whole reason to write the questions down instead of asking them by hand: a change that quietly breaks an answer you already had is the failure mode this catches.
5. Decide who can reach it
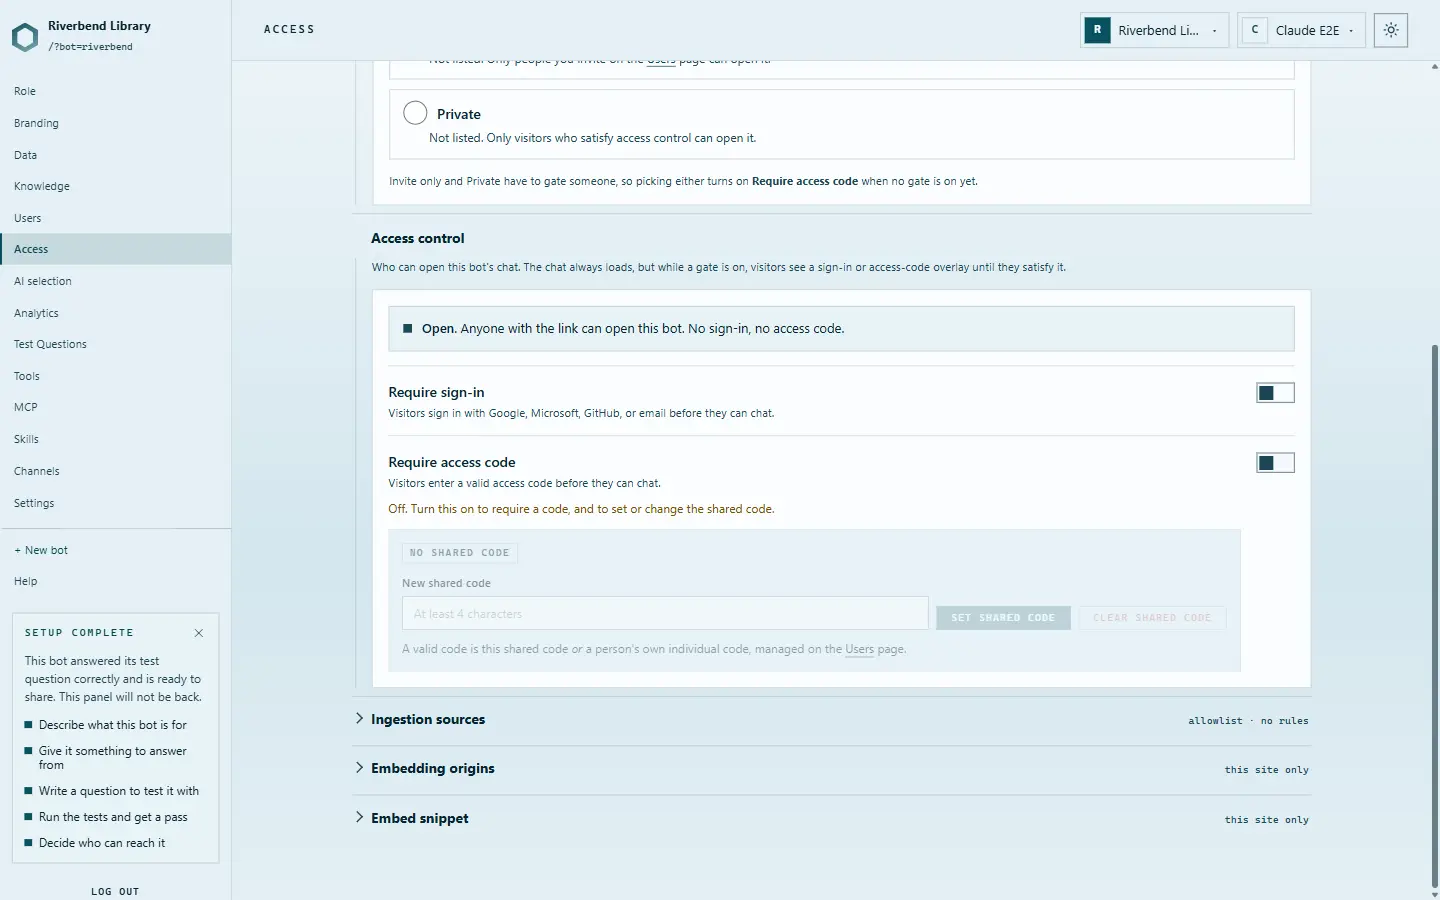
Access asks two separate questions, and it is worth keeping them separate. Discoverability is where the bot can be found — listed in the public directory, or unlisted and reachable only by link, invite, or not at all. Access control is who can open it once they are there: nobody, a sign-in, or an access code.
A bot listed publicly is exactly that: the directory shows it, and its profile page is indexable. A private or invite-only bot is never listed, and its profile answers 404 to anyone who guesses the address.
6. Embed it
The same page carries the embed snippet, already filled in with this bot's address.
Paste it where the chat should appear. It is an iframe, and it obeys the
Embedding origins policy directly above it — on the default policy it loads on this
site only, so a copy of the snippet on someone else's domain does nothing until you allow
that origin.
Does it work?
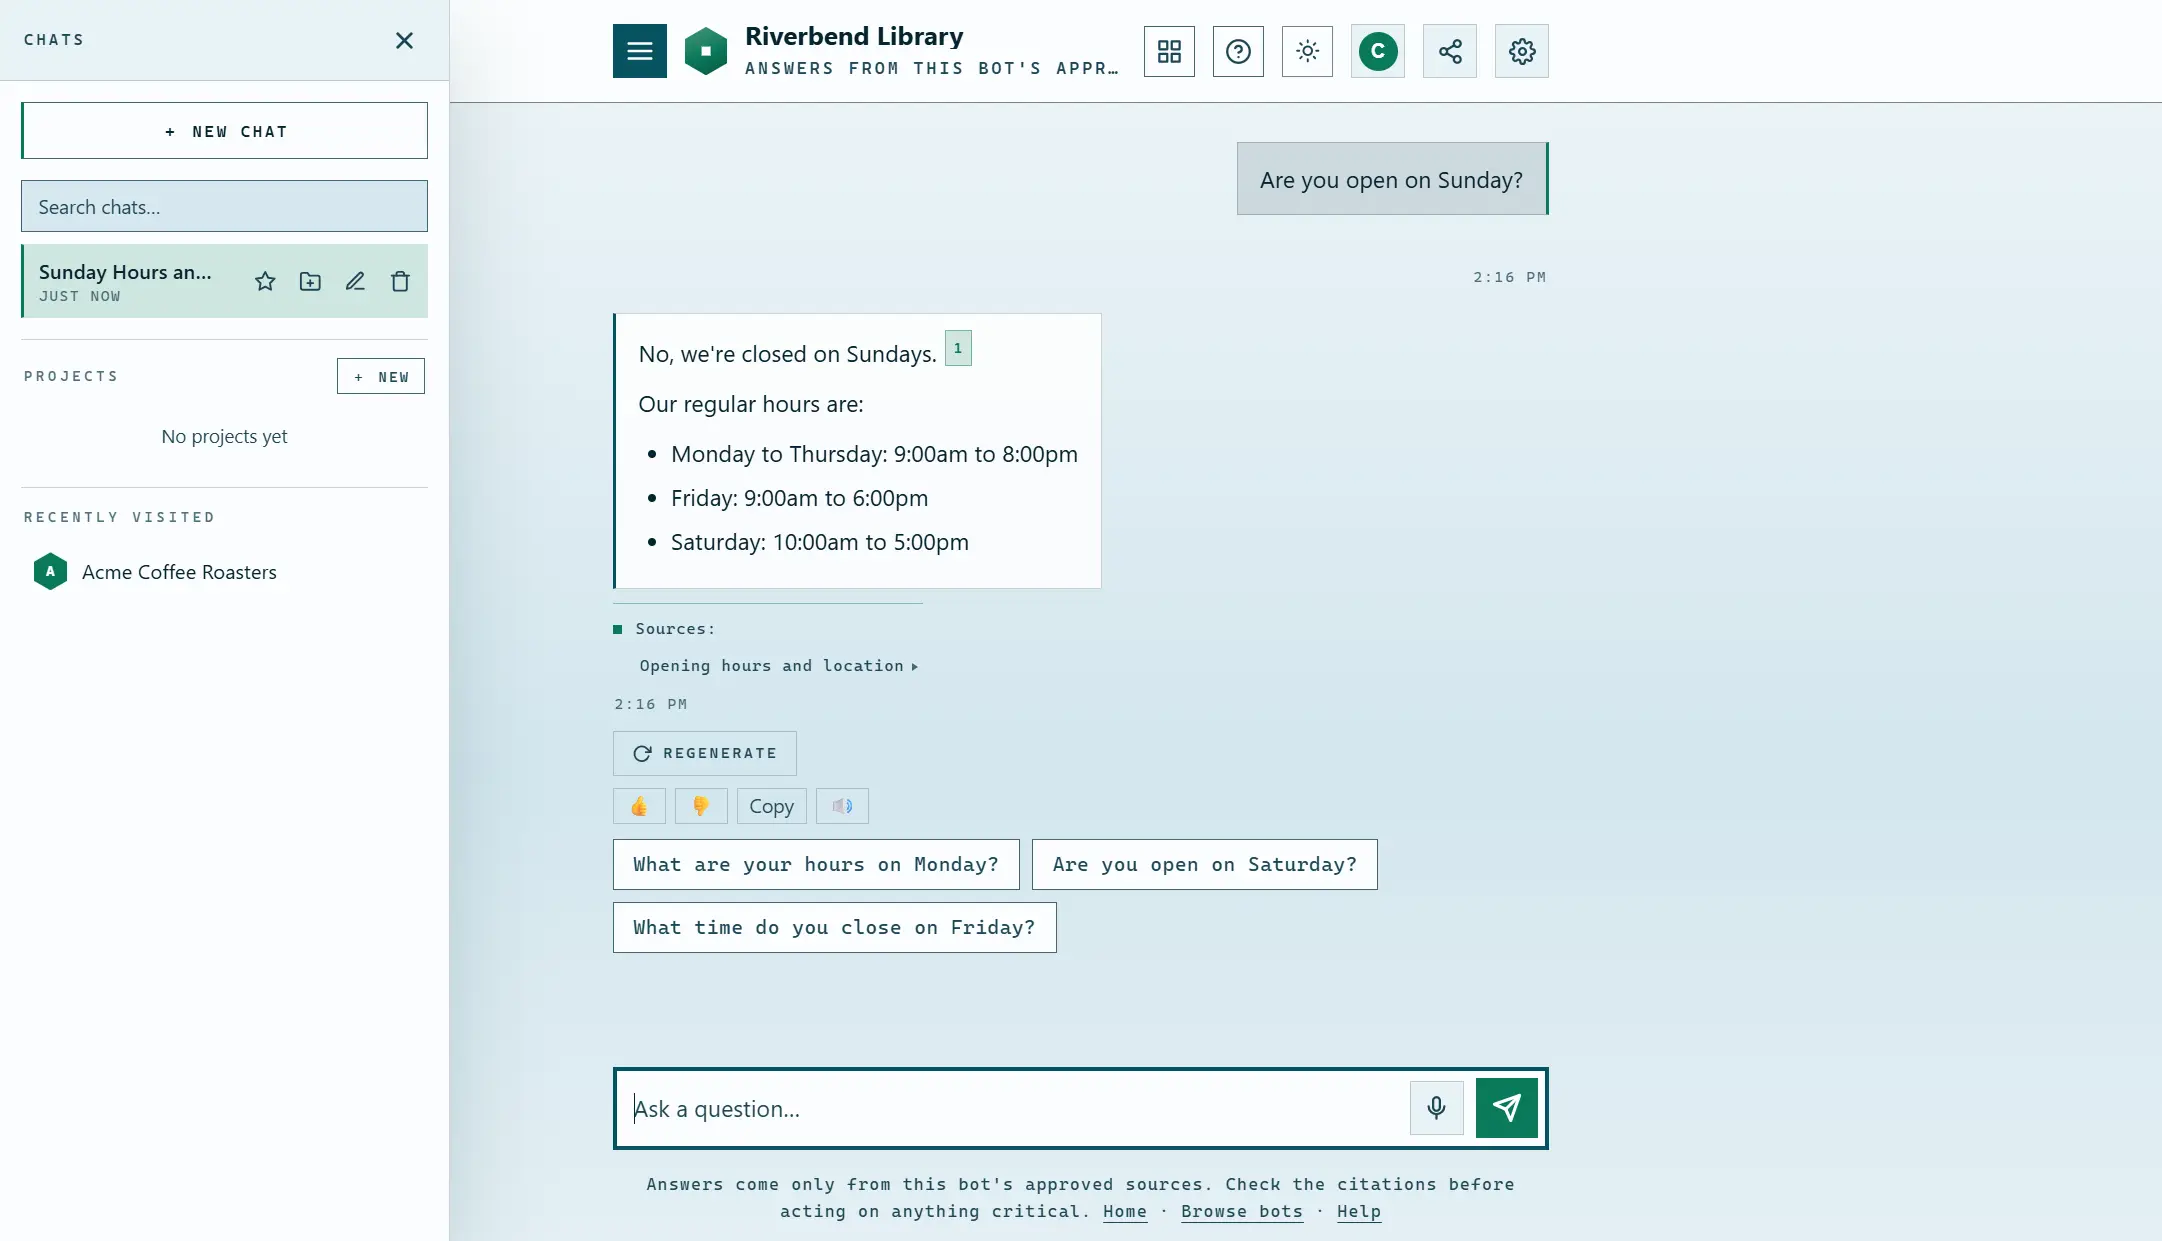
The test above says the bot answers a question it was asked to answer. This is what a visitor sees: the answer, the marker beside the sentence it came from, and the source underneath. Clicking the marker shows the passage from the knowledge entry written in step 2 — the actual quoted text, not a summary of it.
That is the whole loop. Everything else in the console — branding, datasets, uploads, voice, MCP servers, skills, channels — is optional, off by default, and can be added to a bot that already works.